Part 1: Hardware and Features
Part 2: User Interface
Part 3: Limitations
Part 4: Shooting Mode
Part 5: Scene Mode
Part 6: Summary and Conclusion
Limitations
Every camera has their own limitations, be it compact camera, DSLR, analogue, polaroid, lomo and of course, our phone camera. The first thing a photographer need to learn, is how to work within the limitations of their gears. You need to know what can your camera do, and what your camera can't do because each camera has their own strength and weaknesses, and don't expect your phone camera to be God when it comes to taking pictures. I believe everyone knows about how awful the quality of a phone camera especially for those who start using a camera phone since the 0.3MP era (not even VGA). As for the S3, it is capable of shooting most of daily snap shots that is required for any social networking needs like Facebook and twitter, and even some blogging needs as well.
So, let's run down on the limitations of this phone's camera. I will start with the auto mode, which is everything by default.
In Auto mode:
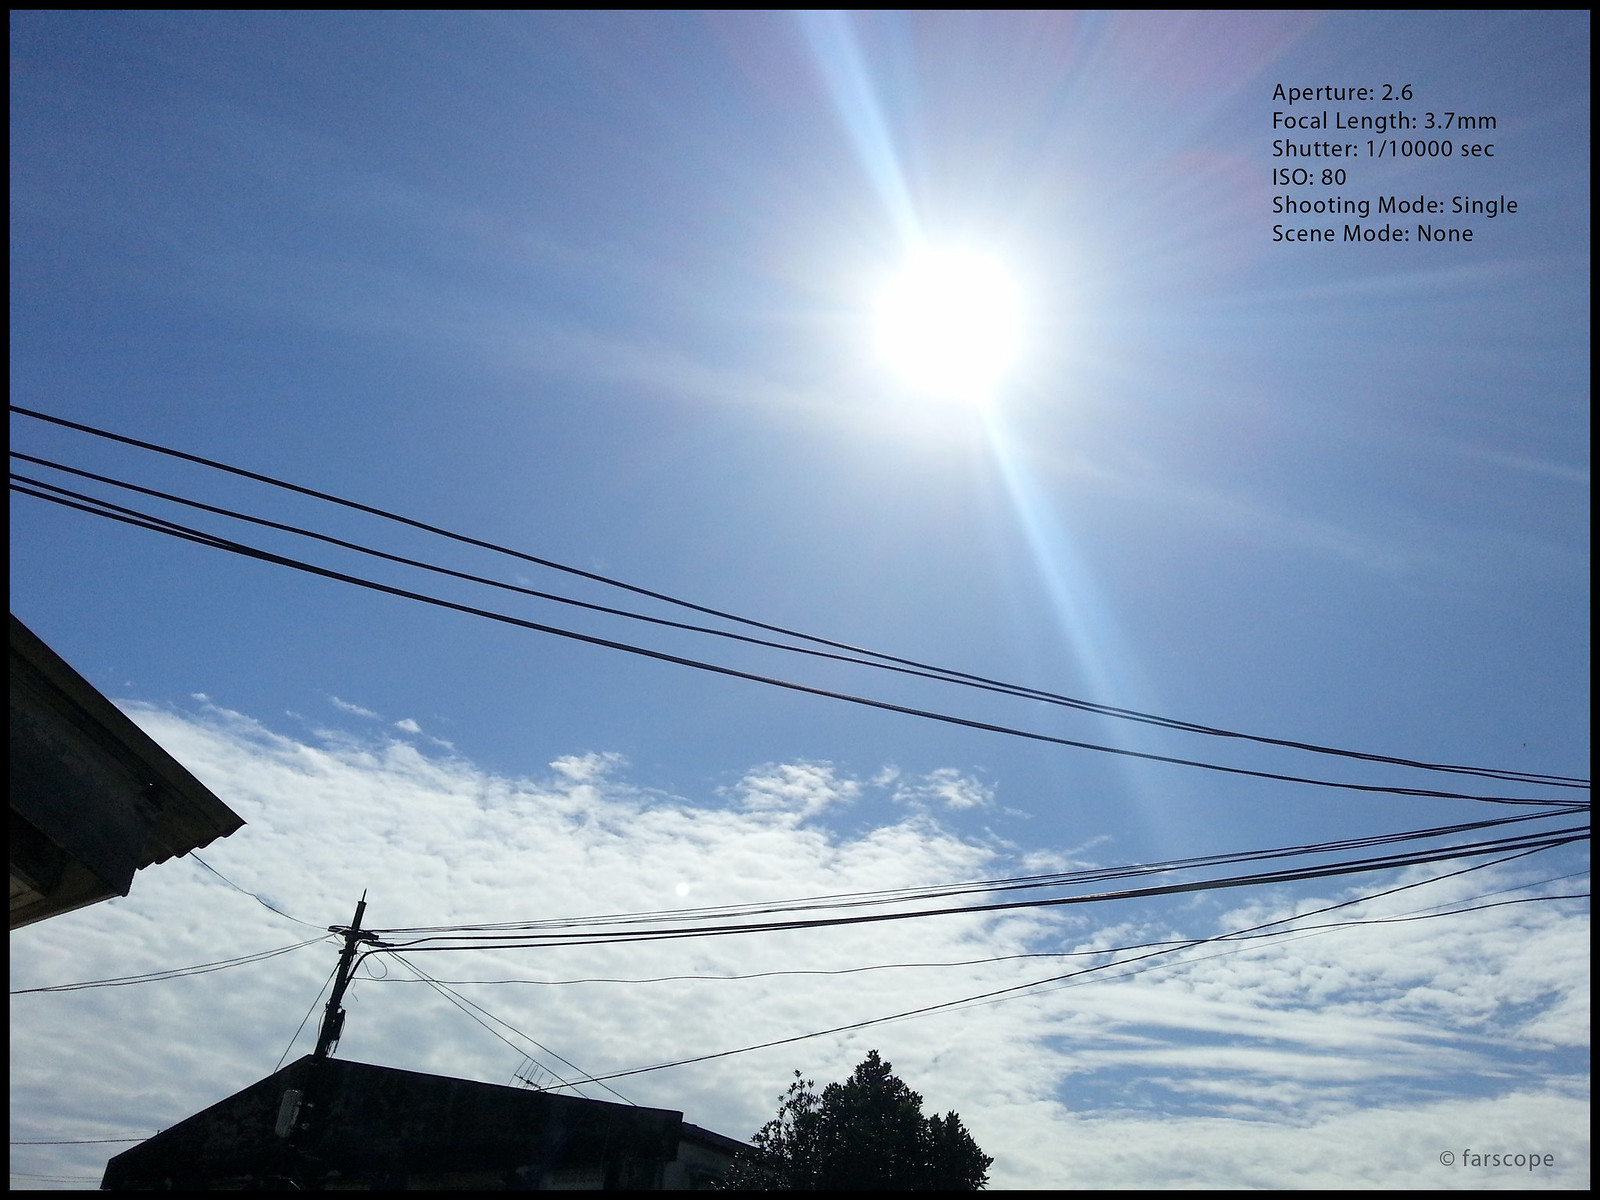
ISO: 80 (min), 1600 (max)
Shutter: 1/10000 sec (min), 1/17 sec (max)
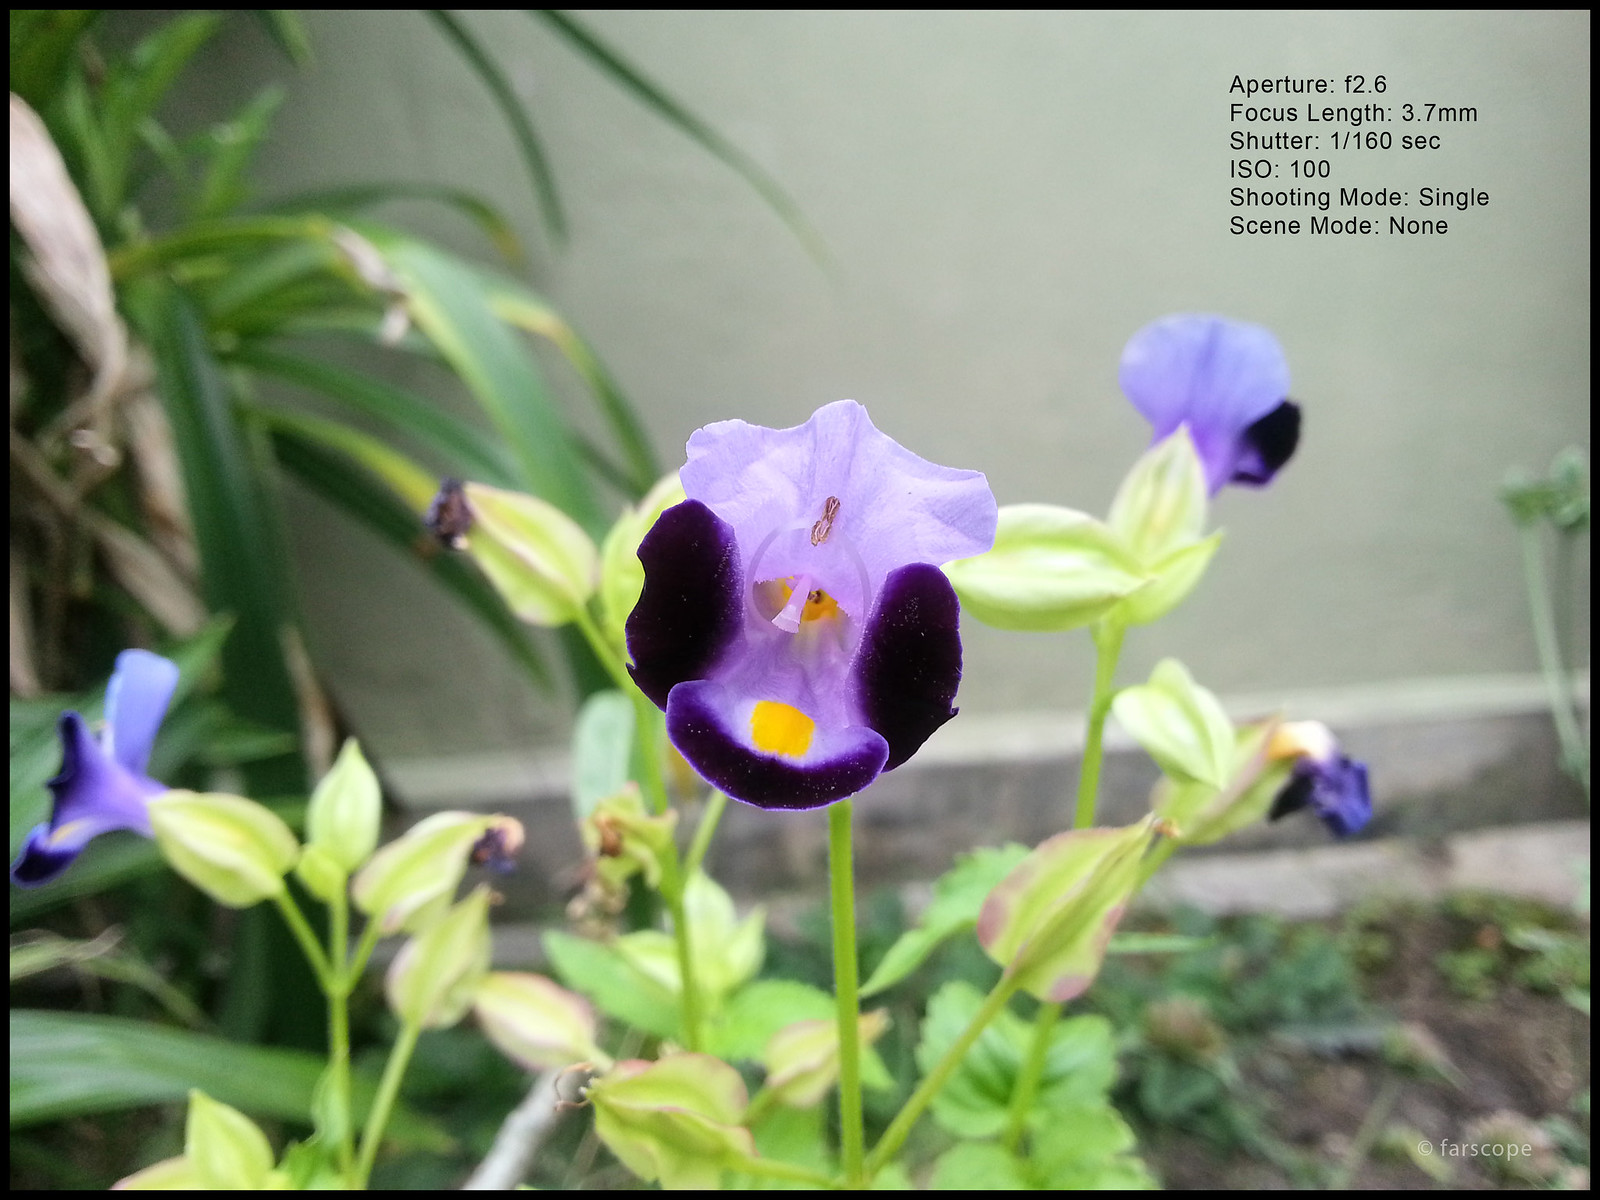
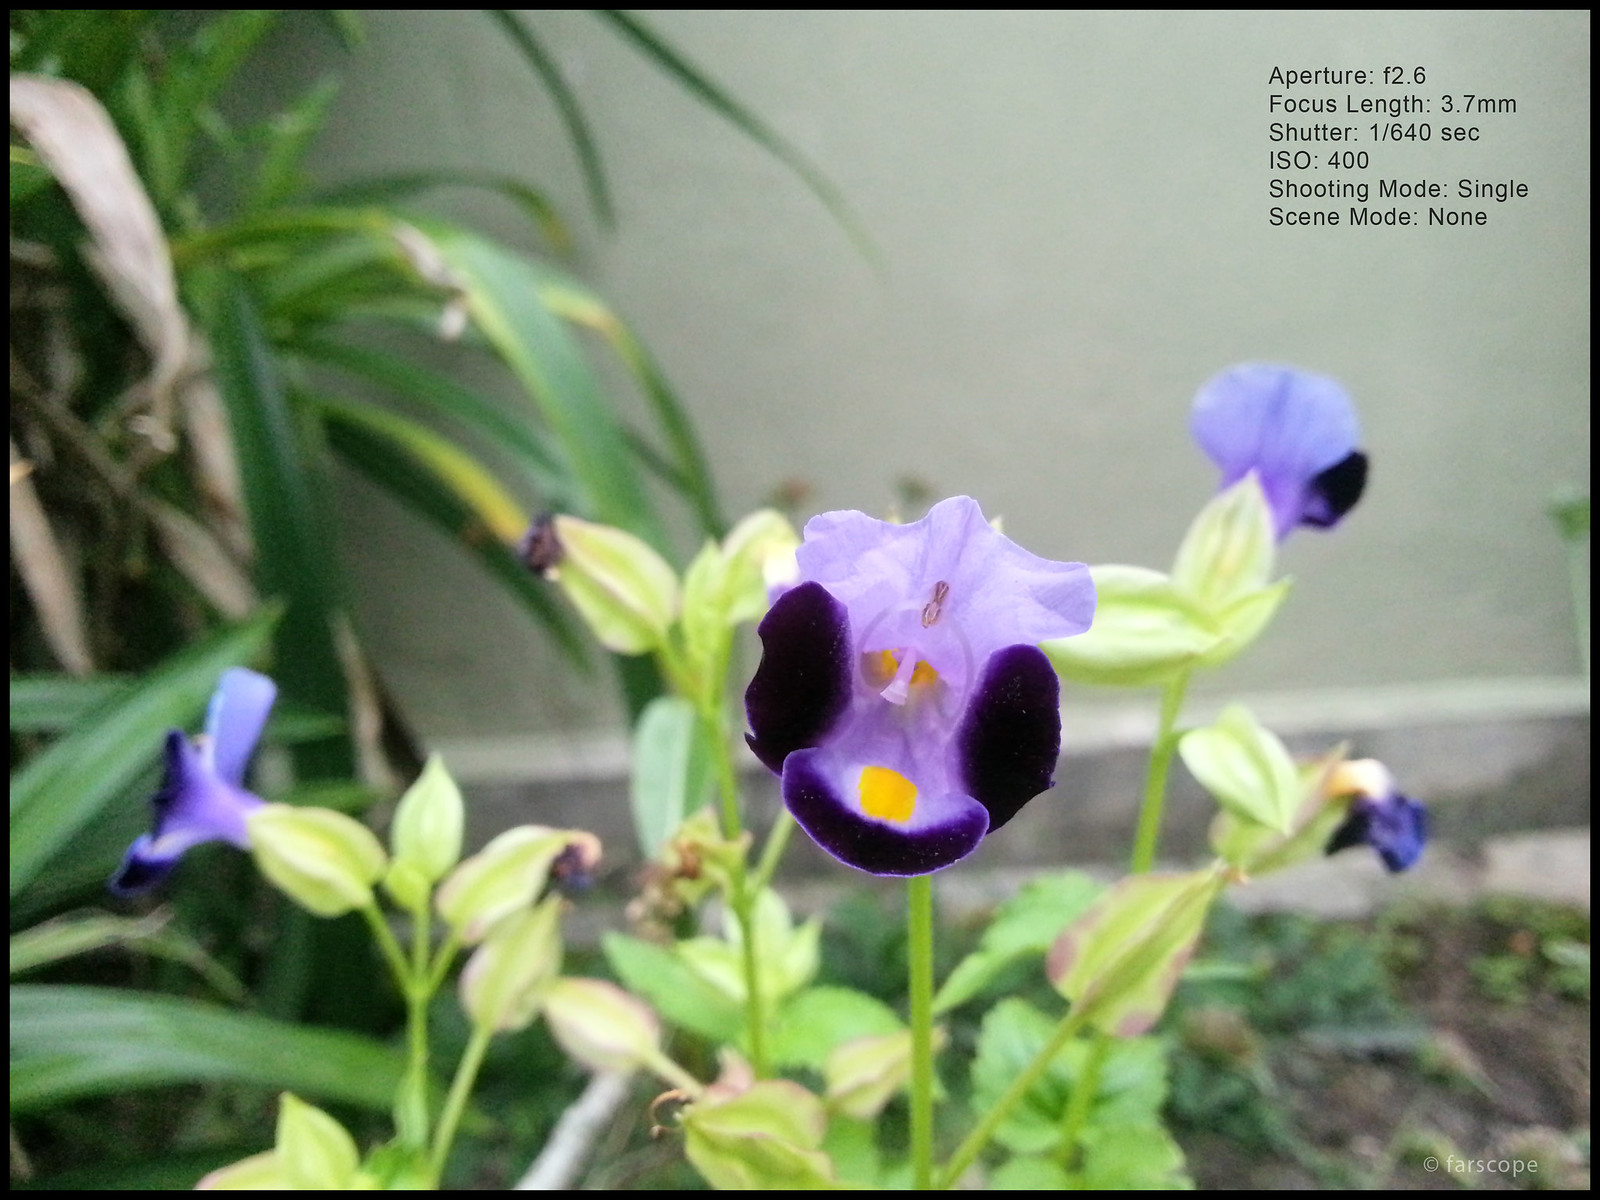
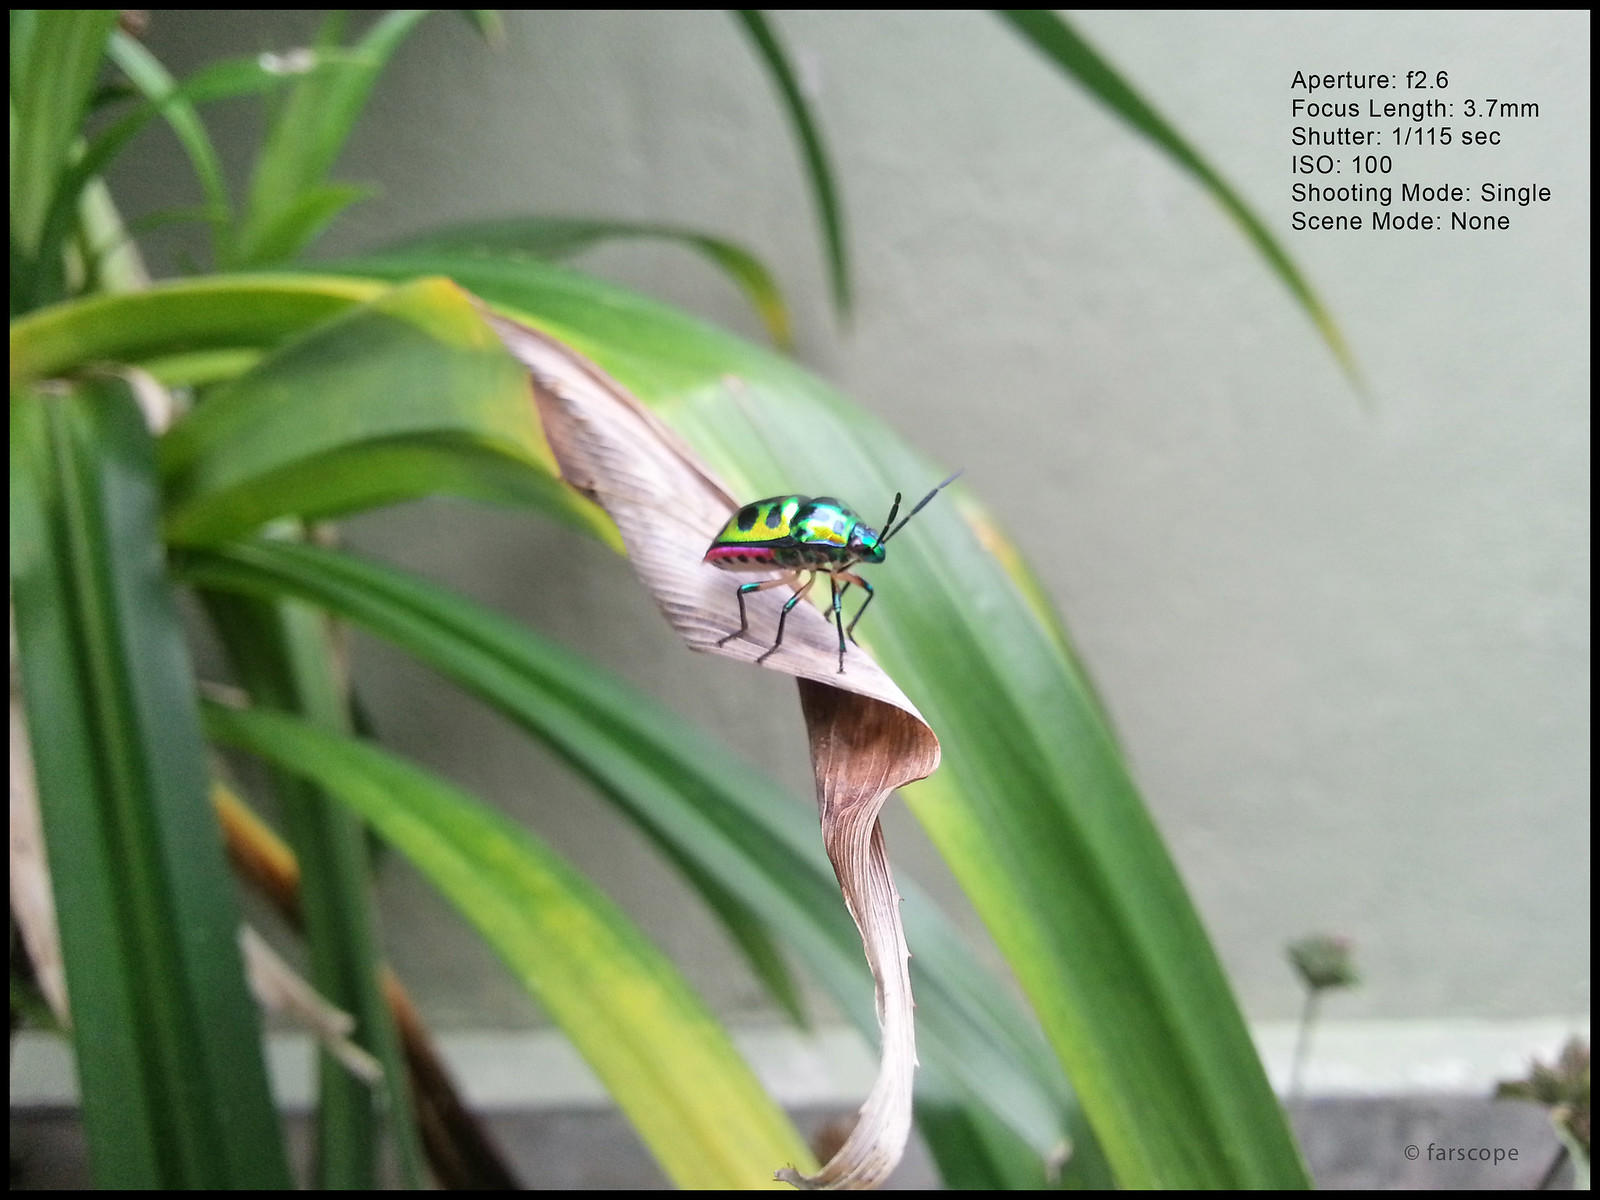
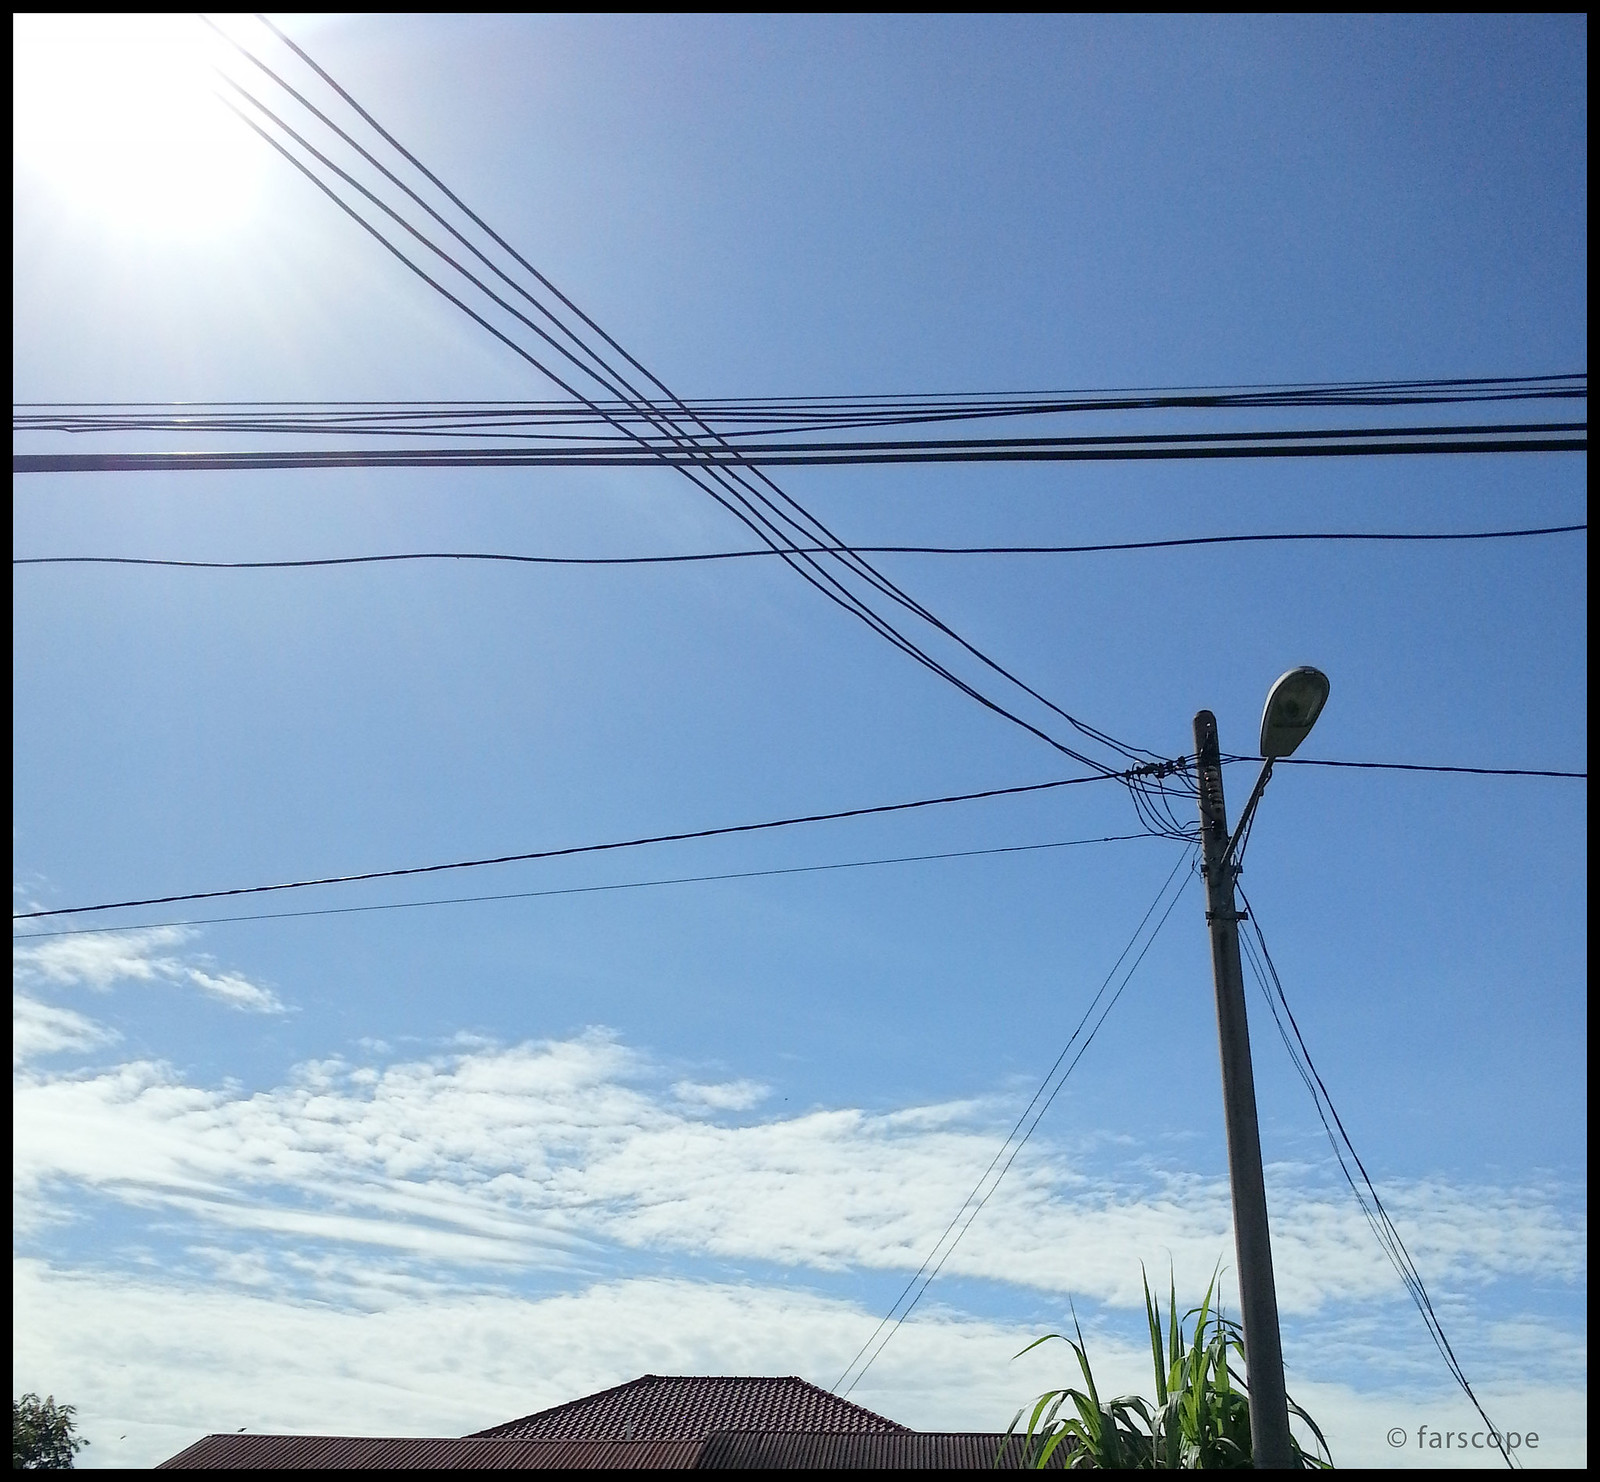
Aperture: f2.6
Zoom: Digital Zoom up to x4
In Manual mode:
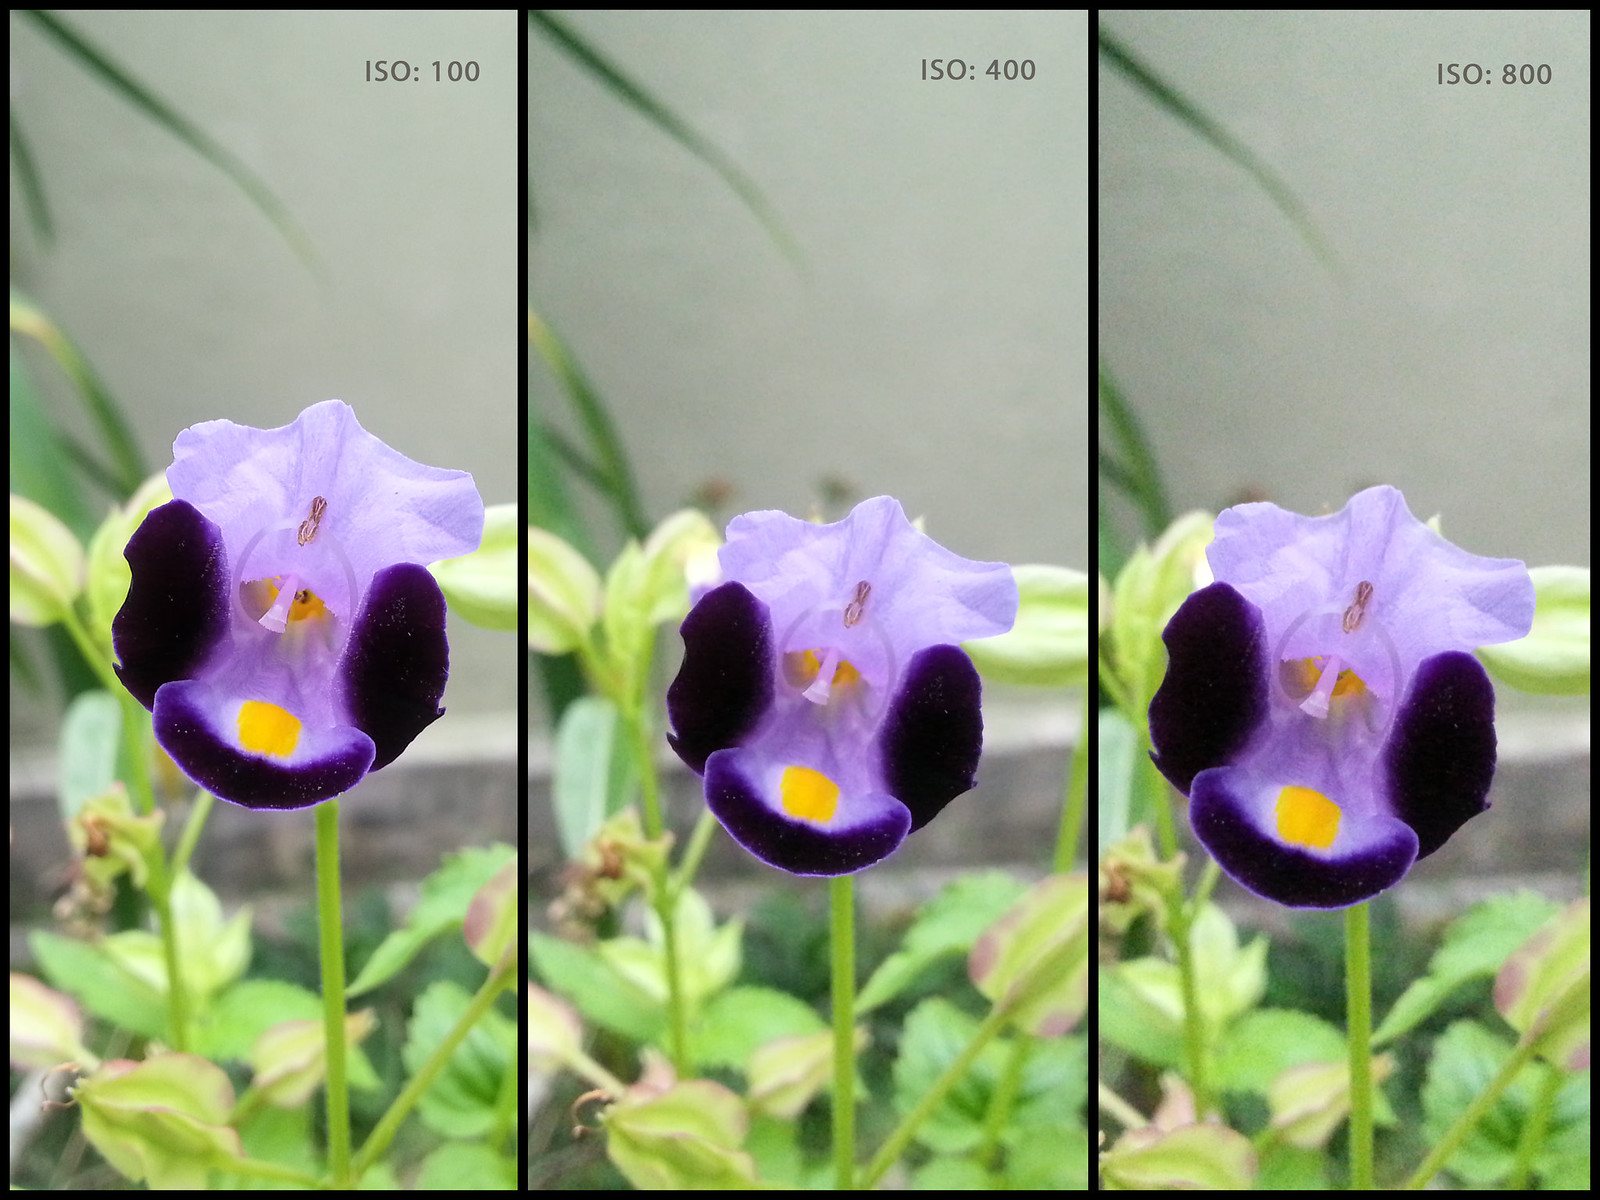
ISO: 100 (min), 800 (max)
Shutter: no Tv mode
Aperture: no Av mode
Zoom: Digital Zoom up to x4
Camera's real limitation
ISO: 80 (min), 1600 (max)
Shutter: 1/10000 sec (min), 1 sec (max)
Aperture: f2.6
Zoom: Digital Zoom up to x4
Shutter
The exposure of an image is determined by three main factors as described by the Exposure Triangle, i.e. the aperture, shutter speed and the ISO. Since the aperture of the Galaxy S3 is fixed at f2.6, the exposure can only be controlled by the other two factors.
The camera software will determine the exposure through it's metering settings, then it will choose the slowest shutter speed possible and then only bump up the ISO if the shutter speed is not enough to achieve a proper exposure of the image. it will not go below 1/17 to avoid hand shake that will create motion blur in your image, unless you purposely want that blur. This applies to most auto modes with the exception of Sport mode, Night mode and other low light modes.
Handshake
Do take note that the hand shake is more severe when holding in vertical position because the camera is located at the top part of the phone and when u tap the shutter button at the lower part of the camera, the camera will tilt forward even if you don't notice it. Any small movement near the datum point (the position near you hold your phone) will be amplified at the top end of the phone.
Hence, it is more recommended to use horizontal position when shooting in low light because the camera position is at the same axis as the shutter button, which is at the middle of the phone. Besides that, in horizontal position, you can hold the phone more naturally with both hands, boosting better stability. Alternatively, you can enable the Anti Handshake function in the Settings. This function will provide 1-stop advantage by limiting the maximum shutter speed at 1/33 and bump up the ISO by 1-stop. In other words, you sacrifice the image quality for a better stability.
For example: a typical photo requires shutter speed of 1/17 sec and ISO-800 to achieve a proper exposure. But when the Anti Handshake function is turned on, the shutter speed will decrease to 1/33 sec while the ISO is bumped up to ISO-1600. Achieving a one-stop advantage to reduce hand shake.
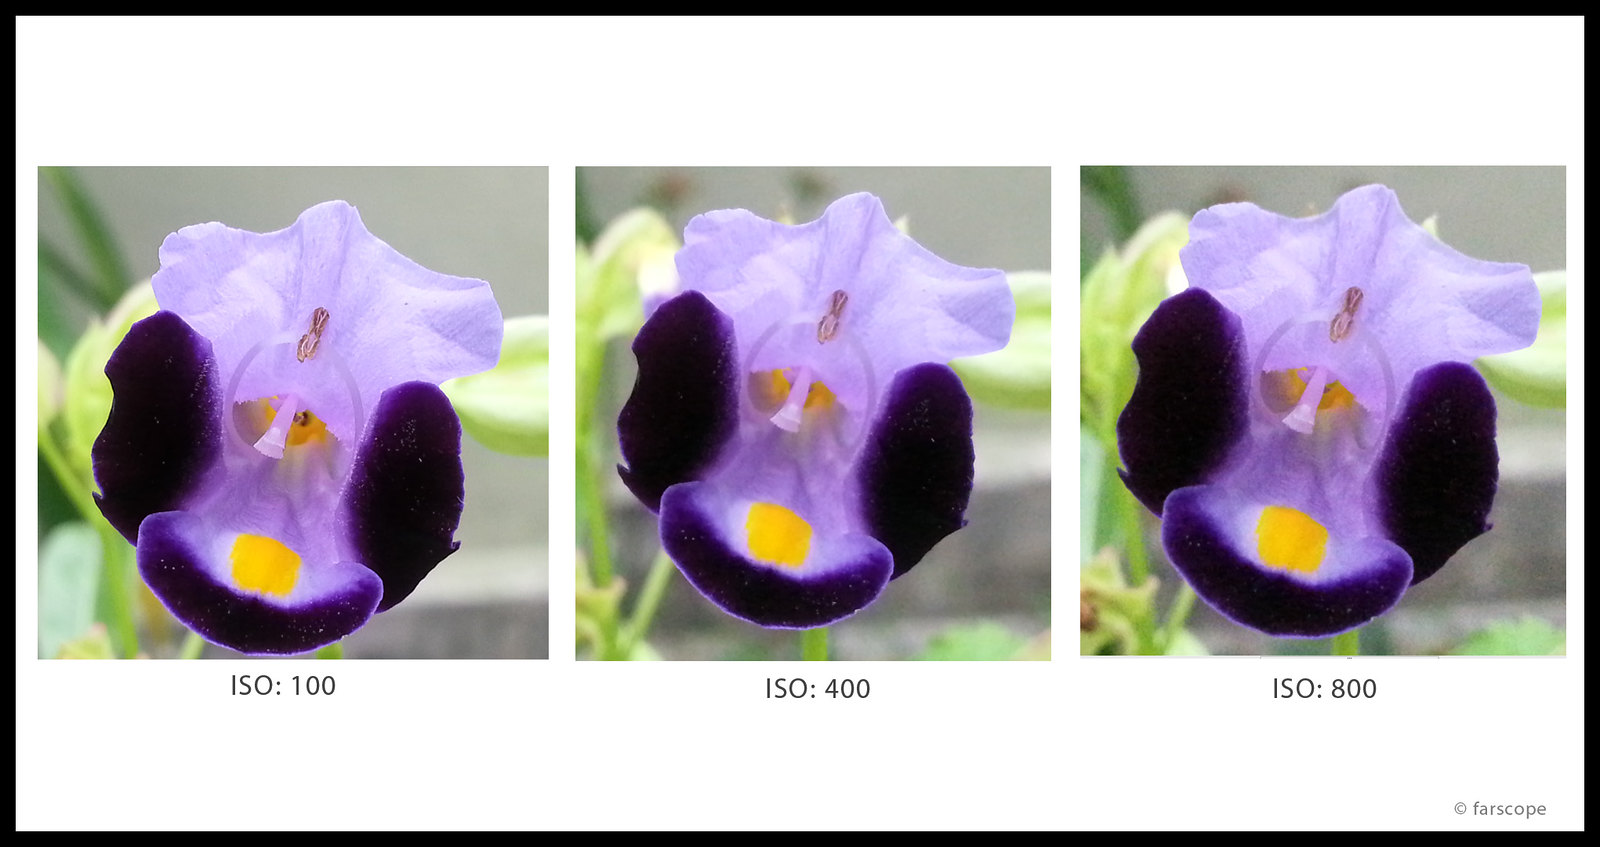
ISO
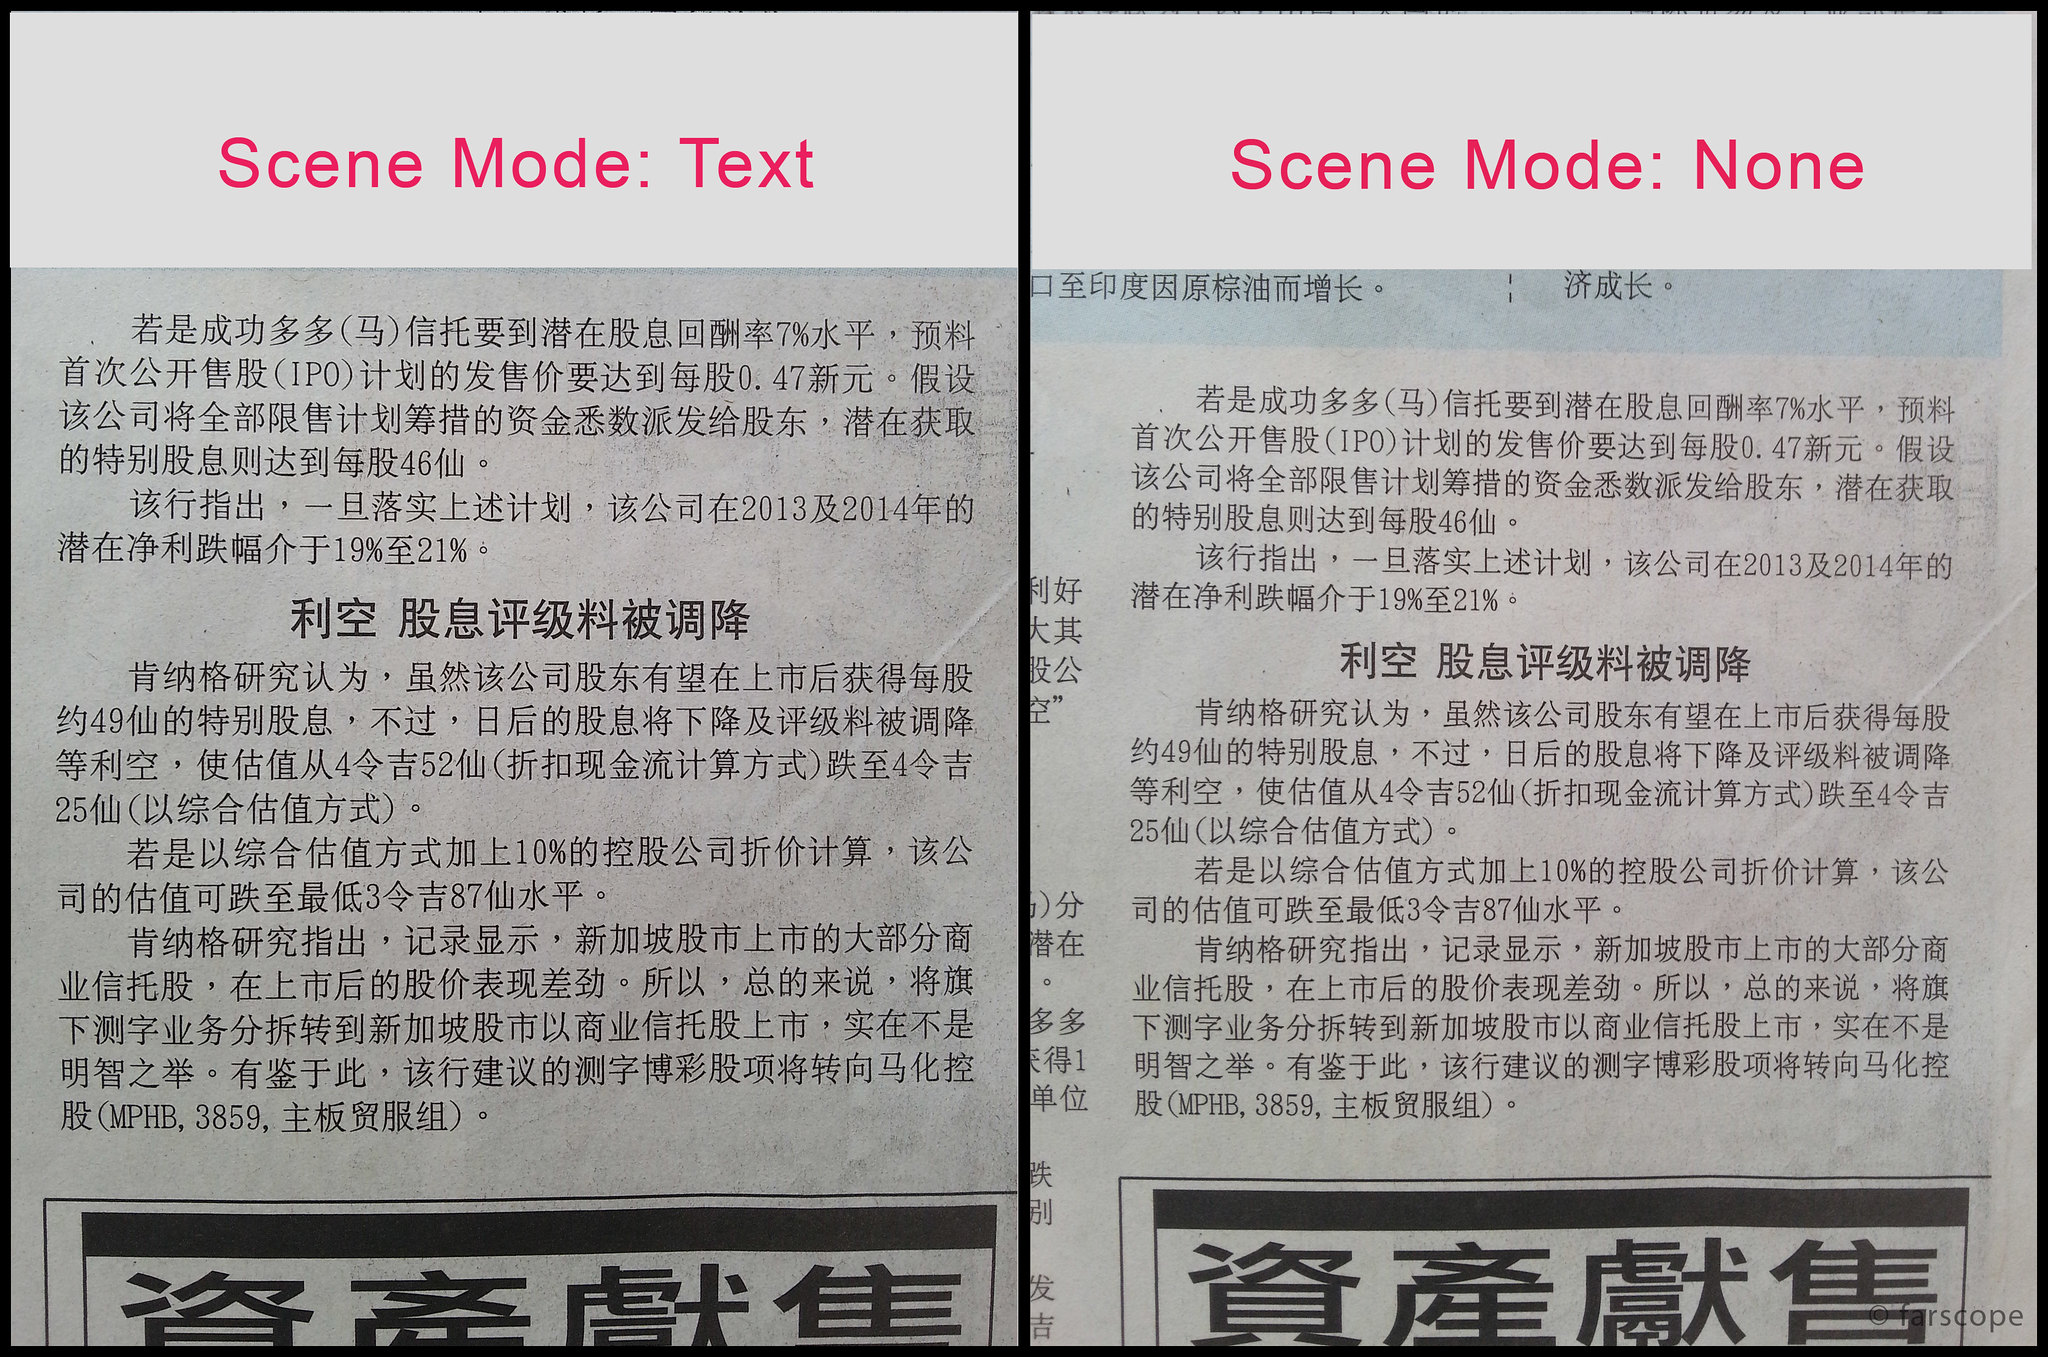
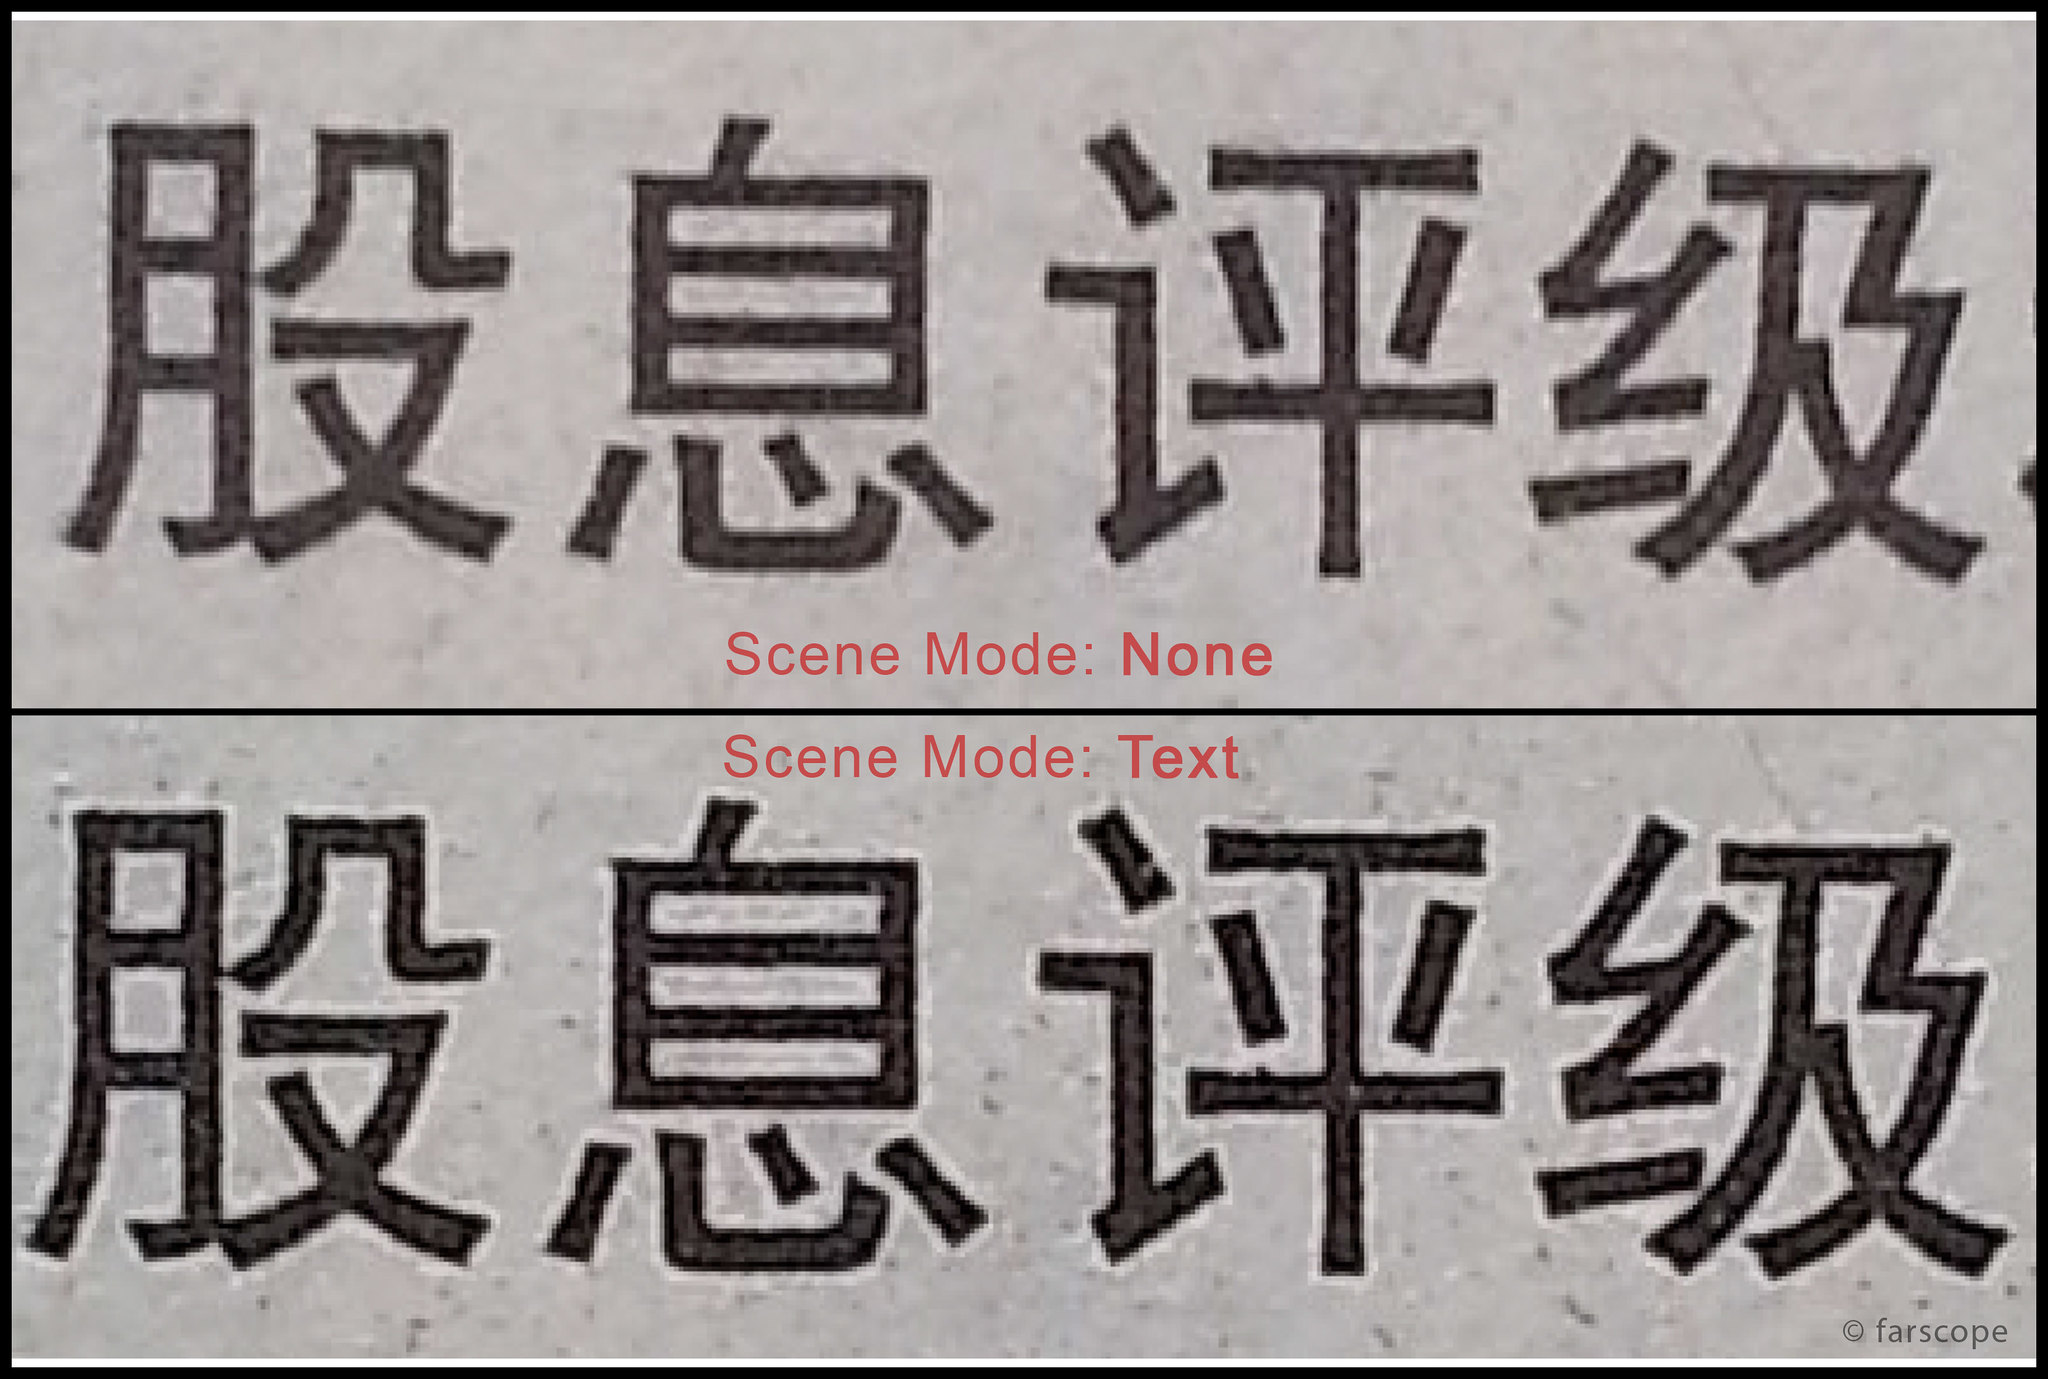
ISO is what every photographer loves and hates the most. Bumping ISO enables us to achieve better exposure in low light conditions but on the other hand reduces sharpness and details and increases noise at the same time. The Galaxy S3 camera has a ISO range of ISO-80 to ISO-1600 with manual settings of ISO-100 to ISO-800 only. Sharpness and details are very well preserved up to ISO-400. Anything higher than ISO-400 then do expect degradation of image quality, which is expected.
Focus
The focusing in Galaxy S3's camera is pretty tricky. Basically it has three focusing mode, i.e. Auto, Macro and Face. Unlike conventional mechanism in older phones, the Galaxy S3's camera will prefocus before you as soon as you launch the camera app. The focusing speed depends very much on the subject distance and contrast. Focusing objects that are nearer to the camera in macro mode takes more time than usual. The camera often refuses to focus in low light because the contrast is not enough for it to lock a focus.
I believe the camera uses contrast detection for auto-focus similar to other digital cameras. A better read of different types of autofocus can be referred in the Wikipedia link below:
To simplify the understanding, the camera is unable to focus when the focus plane is too dull or in unicolor. Try point your camera to a white wall or a dark background, it will return a red bar indicating unable to focus. Now try move it away to focus on something more colourful or possesses more contrast, then you will see your camera is able to lock focus almost immediately.
In Galaxy S3, Samsung has boost about the ability of the camera to shoot with zero-shutter lag, thanks to ICS and similar to other new flagship smartphones. It is able to achieve this through pre-focus and the camera will take a picture regardless whether the focus is locked or not because it assumes that the focus is done beforehand. The camera will choose the middle point as it's main reference focus point and will refresh it every three seconds or when you move away from the subject. Sometimes when you move too much and the camera locked focus at the wrong subject, don't press the shutter button, let it refocus another time before doing so otherwise you will end up with an out of focus (OOF) image.
It is still recommended to use manual focus in order to achieve a higher success rate, especially when your subject is not in the middle of the frame. Gently tap on the screen to select the place you want to focus, give it some time to lock (more time if is macro) then you can take the picture by tapping the shutter button or using Voice Command. Do note that the focus point will refresh in three seconds and will be back to the middle position again, which is sometimes annoying as you need to manually tap the focus point again.
The auto pre-focus function is there to assist you, not to do everything for you. It works most of the time, but sometimes will also hit and miss. Hence, do check your gallery to make sure the image taken is satisfactory. Else, you can always use the Best Photo function, which still requires a good focus lock before firing the shutter.
Low Light
The camera will suffer focusing issue in low light with no contrast. If your flash is turned off, often you will not get any desirable image that is usable. To get better results, just turn on the flash and the camera will focus on the object with the assist light from the flash before taking the photo. In situations where a flash is not desirable in the photo or no flash is allowed or the assist beam from the flash is unable to help lock the focus, try provide some light source on the subject to let it lock the focus and quickly tap the shutter within three seconds otherwise the focus will refresh itself again.
However, if the situation is really that difficult for the camera to focus, then might as well just forget about taking a picture under that condition and use a proper camera for it. If no other options available, then use the flash.
Flash
Missing your Xenon flash from the Sony Ericsson era? Well, the Galaxy S3 still doesn't come with any proper flash and only equipped with a LED light as a flash. Good thing to note that the LED flash is more diffused and brighter when compared to S2.
Lens
The lens is equipped with an aperture value of f2.6, which is not the fastest lens around but is still considerably fast. With only 2/3 stops losing out to the HTC One X (f2.0) and 1/3 stops to the iPhone 4S (f2.4). The aperture value on S3 is only slightly better than the Galaxy S2 (f2.65). I also noticed that the lens is wider than the Galaxy S2 with a focal length of 3.7mm which equates to about 16mm on a 1.6x crop factor or around 25mm on full frame.
Storage and RAM
In Part I I mentioned about the option to choose the path of storage for the photos. However, in Burst Mode (and Best Photo), the phone storage is the only option available. Even thou you have manually set the photo storage to external SD card, but once you switch to Burst Mode, it will automatically assign the phone as the storage medium. The reason behind this is because the Burst Mode requires high speed buffer for all the photos taken during the Burst Mode. An external SD card is not capable of catering such high speed writing, and to be safe, the phone will use the phone storage instead even thou you might have a Class 10 card inside. When you are done with the Burst Mode and revert back to Single Shot, the phone will automatically change the storage path back to the memory card.
One thing I notice during the Burst Mode is that the speed of capturing photos decreases as it approaches 20. It gets slower as the phone's memory is filled up with all these temporary files, which is understandable. Even my entry level DSLR is not capable of doing constant fps as I fire continuous shutter. You will notice the widgets and app shortcuts in your home screen will reload when you press the home button after the Burst Mode due to the phone's memory being used up by the continuous shutters previously. It will take some time for it to reload and please do not scream that your uber expensive phone lags. It's just reloading its widget, not lagging.
Proceed to
Part 4: Shooting Mode